The team at Tina has been working hard since June 2nd when we launched Tina Cloud alpha. We took all your feedback and thoughts and iterated to make huge improvements to the product. The alpha release contained the core product yet we knew we had some features we wanted to add immediately, including a simplified integration path.
We are pleased to announce that Tina is in beta, and all of the core functionality is in place for your team to have a great content editing experience on Next.js sites! If you are excited as we are you can get started by signing up. But first, I'd love for you to stick around and hear about the team's vision, lessons learned, and what we have added. If you are new to Tina, here is a quick demo:

A quick Message from Scott our CEO
The Tina Beta is a big milestone! All the core functionality is in place for teams to edit content on their Next.js sites. We’re just scratching the surface of what’s possible when you add an amazing content editing experience to content stored in your Git repo. Our goal is to 10x the experience for both developers and content editors.
Lessons Learned
We learned a lot during the alpha stage, which allowed us to drive the product forward.
- It took users a lot longer than we expected to make their first commit using Tina. At the beginning on average, it was over 8 hours. This signaled to us that even our starter took too long to set up.
- You had a lot of questions after using our starter, mostly surrounding content modeling, and our documentation didn't answer them.
- Tina could be used in Production on large sites, and both developers and content writers loved it.
- Creating a Discord allowed us to give and receive real-time feedback, which allowed us to add features, fix bugs, and get people unstuck quickly.
What Does Being Beta Mean for You?
We believe that our product combines a fantastic developer and content creator experience into a single product. The update from alpha to beta is so large that I wanted to write a short paragraph about each part. Below is a list of each update, feel free to click on it to take you to the long-form update:
- Better Documentation
- A new initialize command in the CLI
- Improving and adding guides
- Improving our Tina Starter
- Media Manager
- Caching improvements
- Creating @tinacms/toolkit
- Vercel Integration
- Dashboard Overhaul
- Changes to content modeling
Getting Started with Tina
We wanted to speed up getting Tina up and running, whether this was a newly bootstrapped Next.js application or your Production application. We introduced several things to improve this:
- Better documentation
- A tina init command
- New and improved guides
Better Documentation
The documentation at Tina has been something that we wanted to improve as much as possible, we found people were unsure of Tina's concepts because we did not clearly explain them in the documentation. We spent time crafting documentation that gives a developer of any experience a better understanding of each part of Tina, how they work together and how to accomplish specific tasks.
We also moved and created new navigation menus to better convey the intent of a piece of documentation, for example, if you were looking for the Next.js APIs we have a section for that.
A New Initialize Command in the CLI
Tina init is my favorite addition to the Tina experience. A single command can bootstrap Tina on a Next.js application and do all the heavy lifting for you. The team spent quite a bit of time working on this, and refining it, to get it just right. The command npx @tinacms/cli init command currently does the following:
- Install all dependencies to your application
- Add the Tina commands to your package.json (
tina-dev,tina-build,tina-start) - Wrap your
app.js/app.tsxin ourTinaEditProvider - Create demo data that you can test Tina out with.
- Create an admin route to allow people to edit, and a way to exit.
- Create a schema file ready for you to shape your content
This allows you to move quickly and experience Tina without having to write any code. Then when you are ready you can easily extend it to use parts of your existing site.
Improving and Adding Guides
When we introduced Tina, we had a single guide that got you up and running with our Tina Cloud Starter. This was a great way for users to experience Tina but we found that people were missing some key concepts of Tina.
I went back to the drawing board and created a new guide that takes the Next.js Starter Blog and adds Tina and Tina Cloud to it while explaining each concept as we went. This feels like a perfect way to show off Tina, learn how to use Tina, with something that many users are familiar with.
We also removed old guides that no longer promote Tina's best practices and moved some of our other guides into our experimental section. Experimental to us means that we can't guarantee that there won't be bugs or issues with the packages used.
Improving our Tina Starter
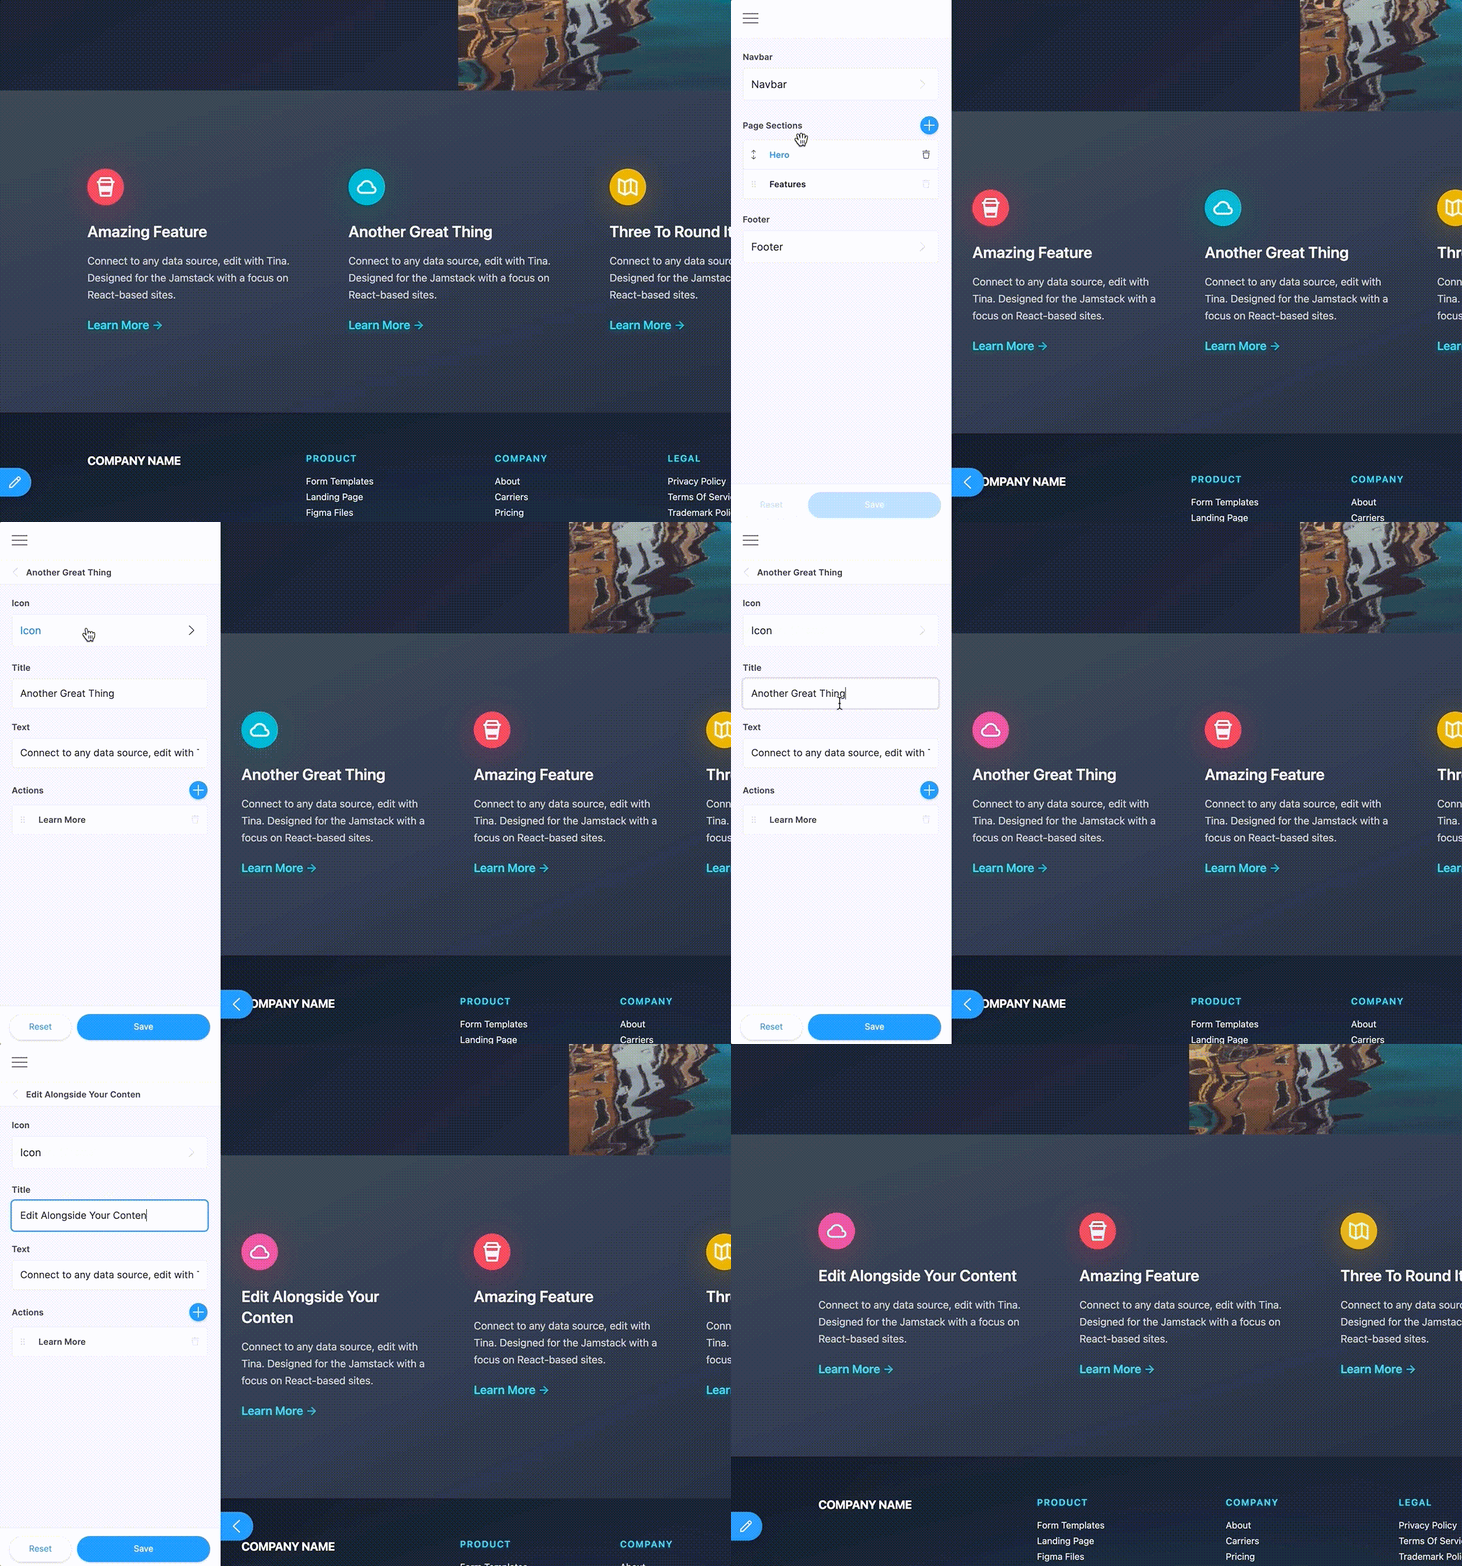
The Tina Starter was built originally to show "the power of Tina" while it did that, we didn't feel that it showed a real-world example. So we went back to the drawing board and created our new Tina Starter, which includes a landing page, blog, and about pages. You can edit and rearrange the content and we styled it with TailwindCSS to give it some extra shine! Below is an example of just some of the work you can do:

Media Manager
Media manager was one of the most important features that we needed for Tina Cloud. Our Cloudinary Media manager allows you to change images, upload new images, and delete ones you no longer need without ever leaving the Tina editing experience.
I wrote a blog post announcing it and how to implement it into your application.
Caching Improvements
Speed and performance have been something we have been actively working on. We introduced some improvements behind the scenes to improve the way we retrieve the data for your site. Tina is carefully built with performance in mind and is now faster!
Creating @tinacms/toolkit
TinaCMS was built with small modular packages, this meant that we relied heavily on React context. The dependency mismatches from over-modularizing our toolkit led to many bugs related to missing context.
Our open-source team created @tinacms/toolkit which incorporates the essentials of Tina all in one place. This simplifies everything for you as a user and Tina as a product.
You can read about all the updates and why decided to make the changes in our pinned GitHub issue.
Vercel Integration
We wanted to reduce the friction to almost zero when testing TinaCMS, so we worked on adding Vercel integration. This means if you sign up for an account, you can one-click and deploy in minutes and start playing around with TinaCMS and Tina Cloud, using our Starter. In the future, we will be adding the ability to deploy any application in Tina Cloud to Vercel!
Dashboard Overhaul
When using Tina Cloud in alpha our dashboard UX wasn't a first-class experience and at times could be confusing. We completely overhauled the dashboard, making it easier and quicker to add an application to the Cloud, invite users, and find important information such as site URL(s) or Client ID.
If you did use the alpha you will need to sign up again as we made large changes to the way we handle user signup in our backend.
Changes to Content Modeling
Content Modeling is the core of how you interact with TinaCMS and also retrieve your content. We decided to make an important change and be more primitive based in nature.
This allows for simplistic queries that don't require disambiguation, we believe this will allow you as a developer to craft queries with ease.
If you used the alpha of Tina you might want to read this article the team put together to explain all of the changes and how to migrate.
Give Us Feedback!
The whole team is truly excited to enter the beta phase and hope you will check it out and give us honest feedback. We want to hear about your projects or, let us know how Tina Cloud can help your team make progress.
To keep up to date with Tina goings-on make sure to follow @tina_cms and @james_r_perkins on Twitter.
Stay tuned for further improvements, features, community-built projects, and more!
